Codigo Escuela 4.0
Article author:
Sergio PeciñaArticle published at:
January 16, 2023
Drawer menu
This test should be carried out every time you print with a new material, as it provides one of the main printing parameter parameter of the filament i.e. the extrusion temperature. This test consists of a staggered part, in which the extrusion temperature will be varied progressively by 5 degrees. As each material has an optimum temperature, this test has different parts for different materials. These parts are practically the same, only the temperature range is different for an easier reading. Please follow the steps below.
Download the appropriate part for the material (PLA, TPU, PETG) to be tested and adjust the printing parameters as follows:
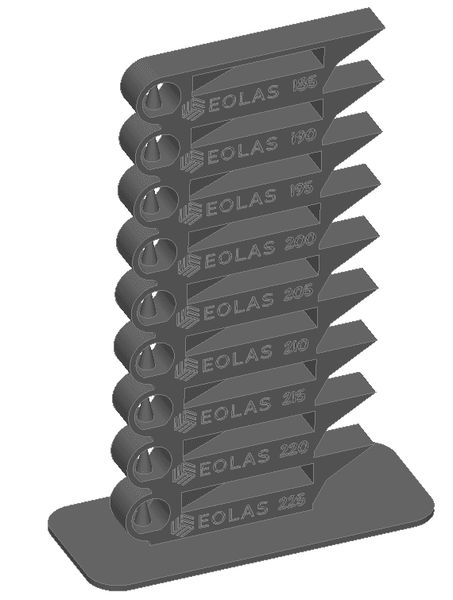
In the slicer, we will adapt the gcode to vary the temperature automatically. This depends on the slicers that is going to be used, here we will use two of the most used slicers: CURA and PrusaSlicer.
We slice the part with the above parameters and click on Extensions → Postprocessing → Modify GCODE. The following pop-up window will appear:
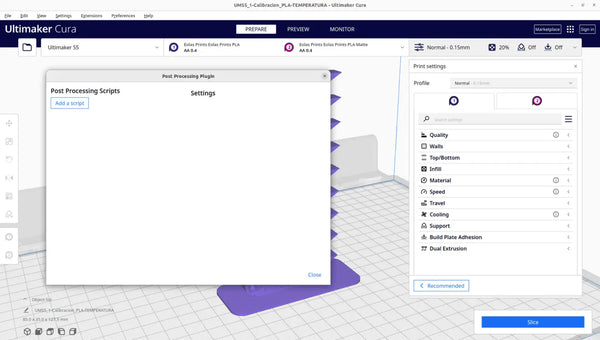
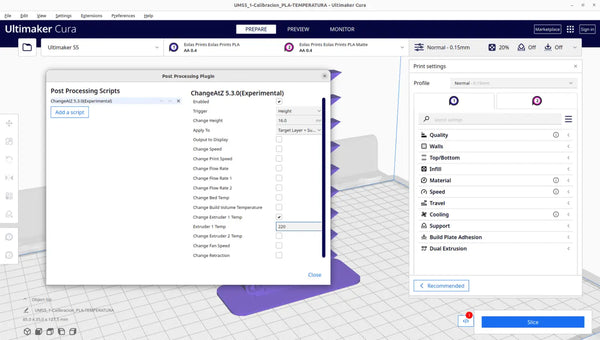
Click on add script and add "ChangeAtZ" and check the option "Change extruder 1 Temp" which is where we will enter the temperature of the second step. We also enter the height of 16 mm which is where the first step ends and the second begins, i.e. the place where we want the temperature change. Make sure to select the 'Apply to' drop-down menu's 'successive layers' option in order to apply the effect to multiple layers.
We add as many scripts as there are steps in the piece, taking into account that the first step ends at 16 mm and the other steps have a measurement of 14 mm.
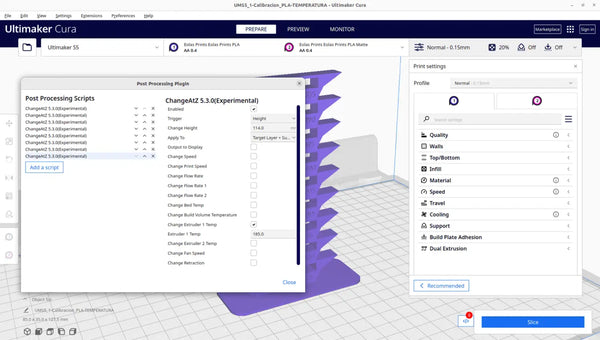
We slice the piece again and it is ready for the temperature change at each step.
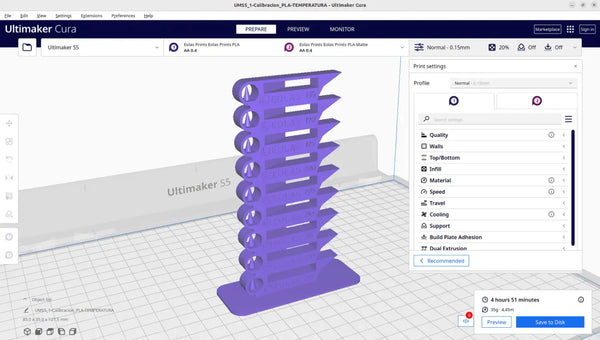
As you can see in the image to the left of the print information, there is a white square with a red circle with a number which indicates how many modifiers we have active at that moment.
We slice the part with the above mentioned parameters.
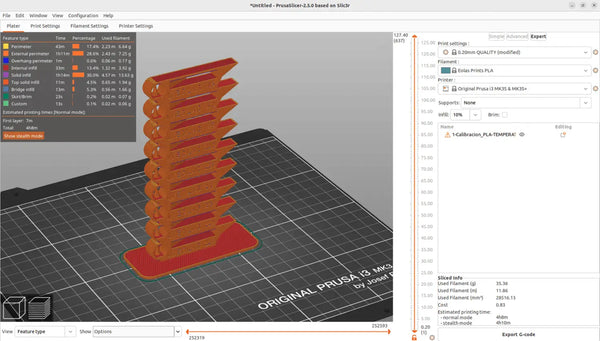
After slicing the part, the gcode is modified using the vertical orange bar to the right of the display.
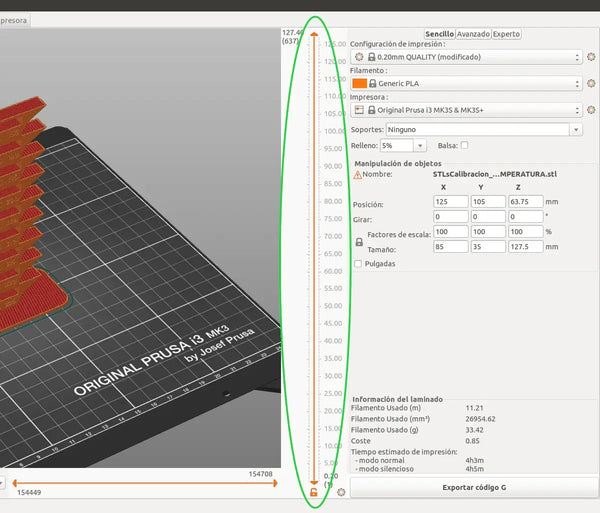
By moving the upper arrow, we place it in the temperature step change position (16mm).
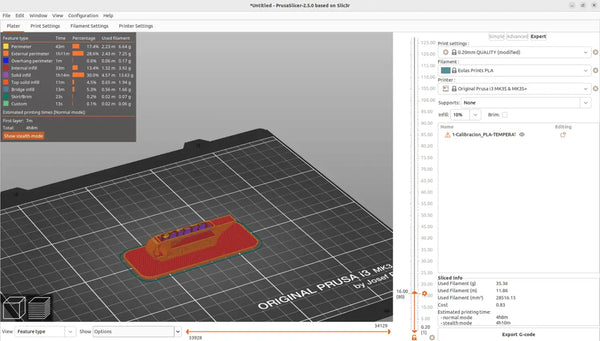
By right clicking on the hexagon next to the arrow, a menu will pop up in which you have to select the option "Add custom G-code". The following pop-up window will open:
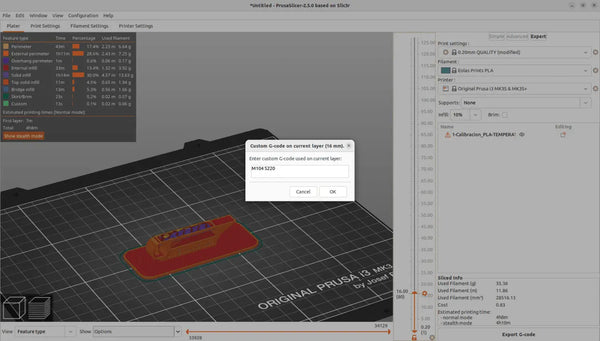
In the window write the temperature change command, which is M104, then indicate the new temperature, which is written in numerical format and placing an "S" in front of the number. For example, in case of PLA, in this first step the temperature should be changed to 220 degrees, so the code to entered would be: M104 S220.
After entering the code, click on accept and we can see that the layer in which the modifier has been entered has changed colour to indicate that some parameter has been changed.
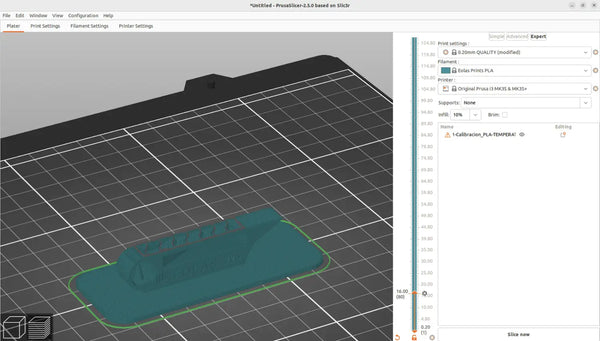
The same procedure is used to change temperature for all subsequent steps. In other words, the step change layer is selected and a temperature modification is added.For example, the step change layer is selected and a temperature modification is added.
When we have modified all the temperatures, slice it again for the changes to be saved in the G code that we will send to the machine.
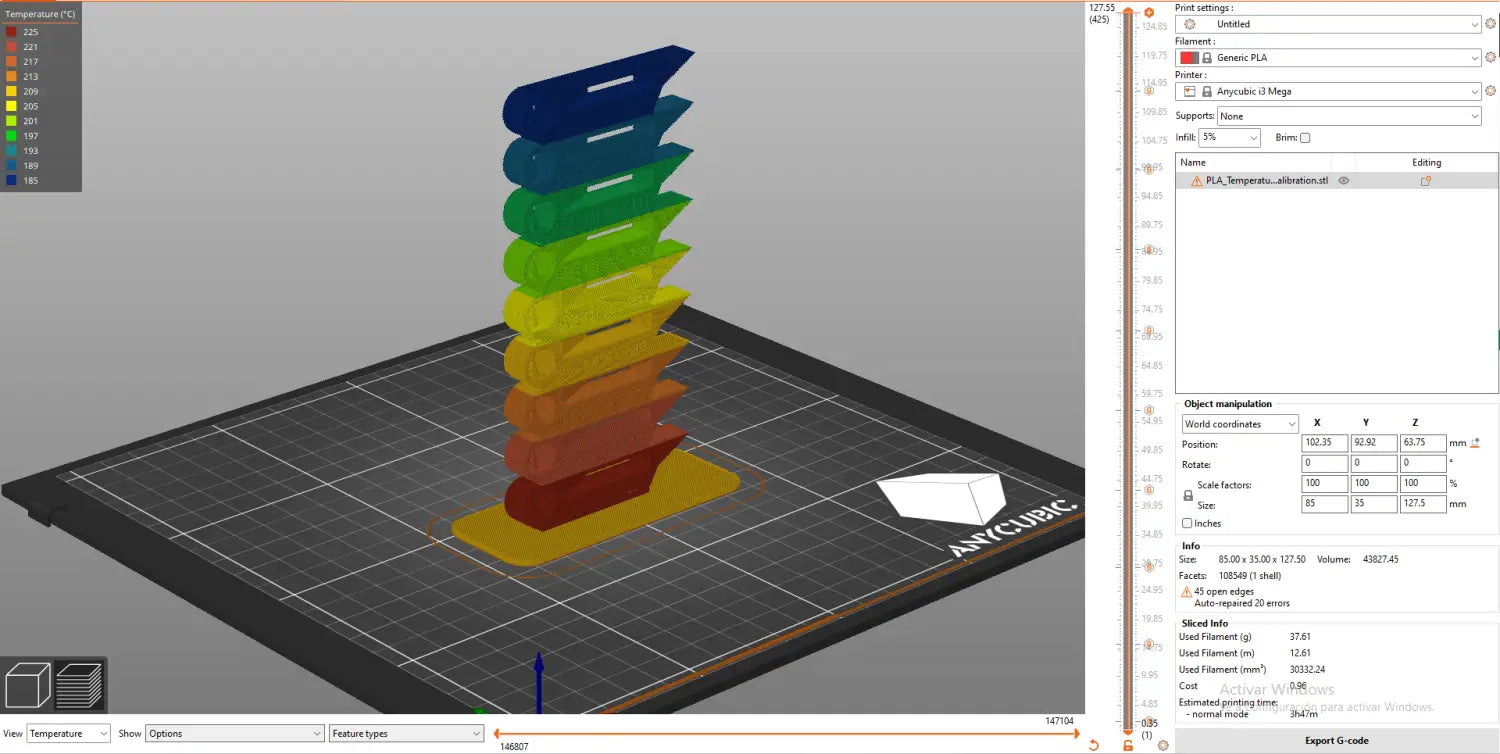
After the temperature tower has finished printing, we observe the different steps with emphasis on the following questions:
After analysing all the rungs, we select the one that is best in these situations and the temperature indicated on it will be the optimum temperature for the analysed material.