
Your cart
Your cart is empty
Continue shoppingDrawer menu

Tinkercad is a free, browser-based 3D design tool from Autodesk that's ideal for the classroom. This guide shows teachers how to set up a virtual classroom, add students safely, assign activities, and track progress — step by step.
Are you interested in teaching 3D design but not sure how to run it in the classroom? Below we introduce Tinkercad and walk through creating a virtual classroom so you can keep track of your students' progress.
Mikko Mononen and Kai Backham developed this user-friendly 3D modelling and design software in 2011 with the goal of allowing anyone to access 3D modelling. Autodesk purchased this program in 2013, and it remains a free resource. It is especially suited for children.
This technique is founded on a straightforward interface of solid geometry to put together 3D models by joining elementary shapes. It has a vast repository of previously made models, and others can be produced by using the JavaScript editor. This software is suitable for use with Minecraft and Lego, and also allows users to export their 3D designs in OBJ and STL, which are the two most widely used formats for 3D printing.
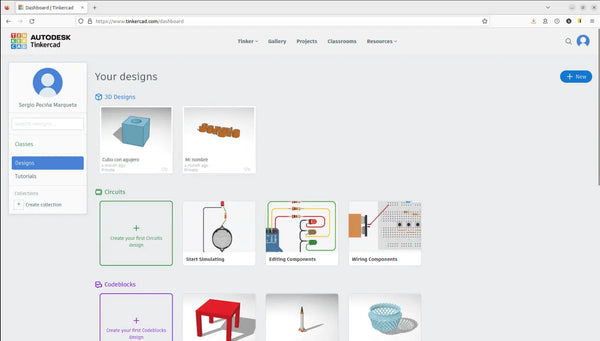
Before educators can start using Tinkercad in the classroom, they must create user accounts for both teachers and students and establish classrooms or classes to keep track of their learners and monitor their progress.
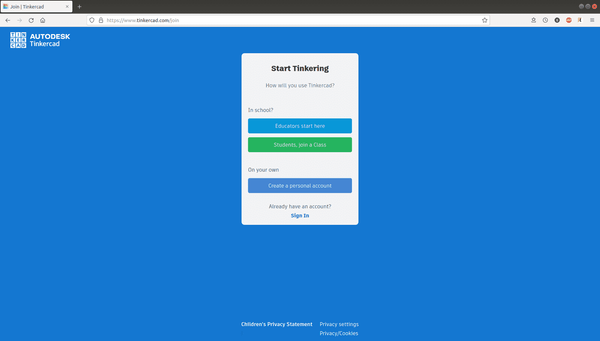
To get started, we must first set up a teacher profile by clicking on the "Sign Up" button. Then, choose the "Educators start here" option and verify the creation of the newly established teacher account.
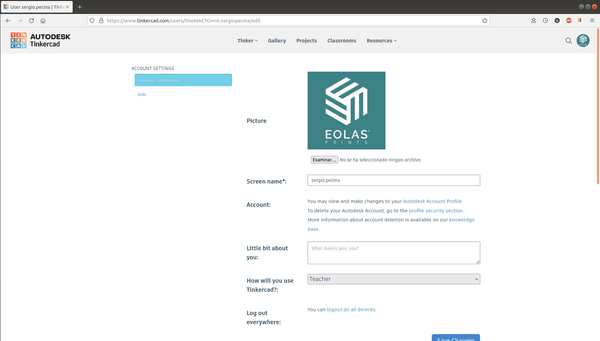
If you have already signed up, navigate to your profile and in the "How will you use Tinkercad?" section, choose "Teacher" to switch your personal account to a teacher account. Remember to save your changes afterwards.
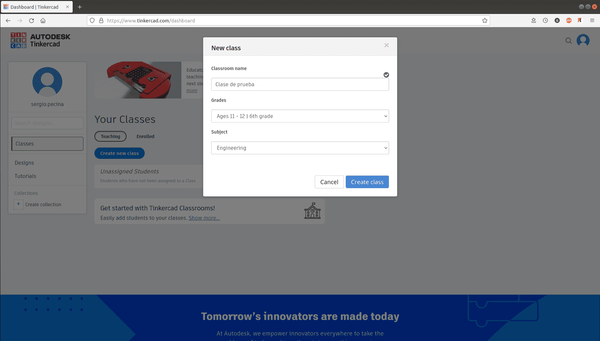
To create a new class, click the "Create new class" button, enter the name of the class, select the course, and specify the subject. Confirm your choices to complete the creation of the class.
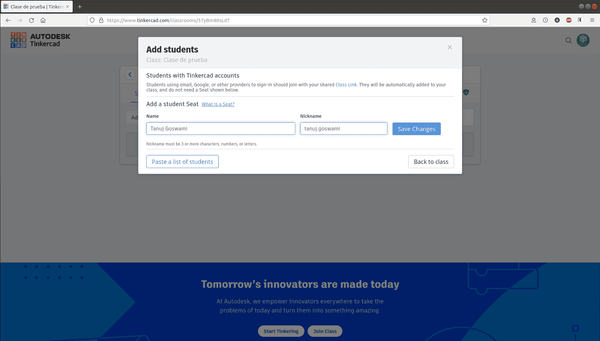
There are two methods of incorporating pupils into a lesson; the first involves entering their identities one by one, while the second entails pasting the complete roster of students from the clipboard.
To make it simpler to identify each student, you can tap on their nickname to modify it to a format such as "firstname.lastname".
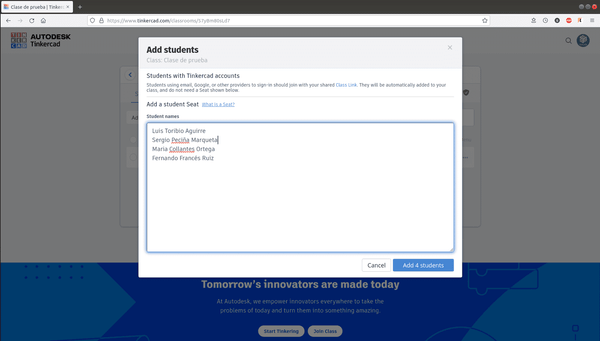
Every student needs to have a nickname and a class code in order to become part of our class. We can either provide them with a link that contains both the code and nickname, or we can give them two separate links - one for the code, and one for the class.
We suggest taking advantage of the link functionality to make things simpler and prevent potential errors.
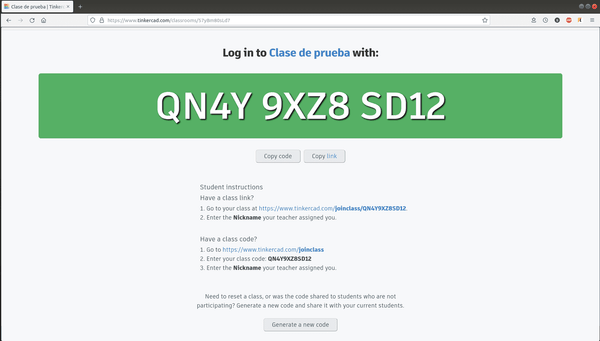
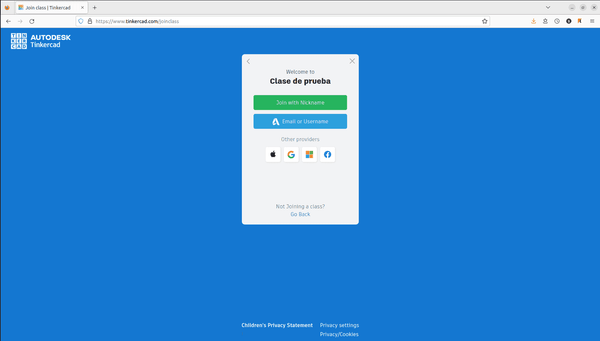
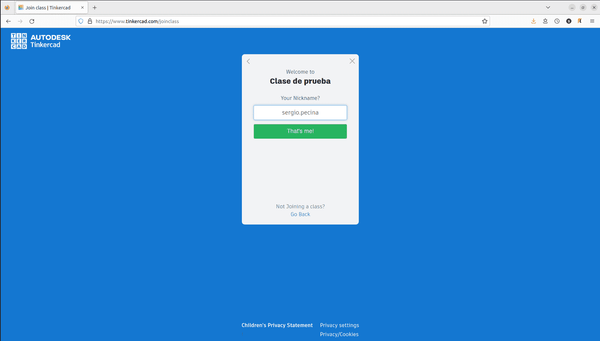
Students can join the class without needing to sign up on the website using the link to our class and the special name we gave them.
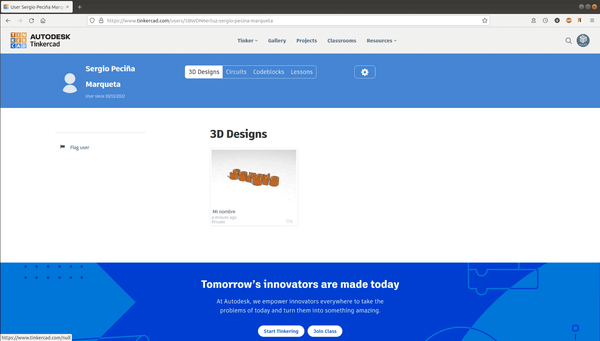
By selecting the student's name, it will be possible to view the tasks that have already been finished and those that are still to be completed, which will make it simpler to keep track of our students.
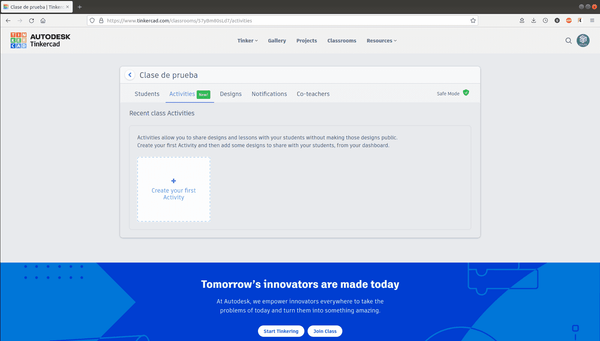
Within this section, teachers are able to create an exercise for their students, and can include a provided design to present the ultimate goal of the assignment.
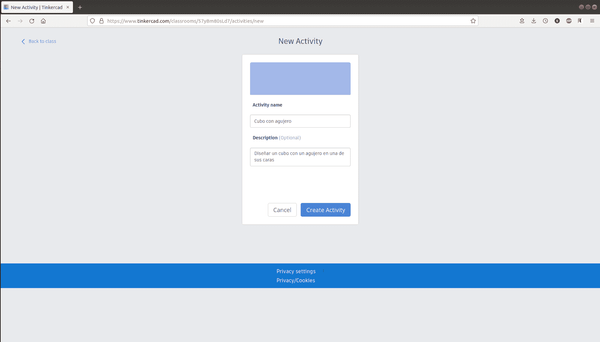
We have put together a basic task in which students must form a cube with a cutout in one of its sides. The teacher has also included a design that students can use to check the accuracy of their own version of the cube.
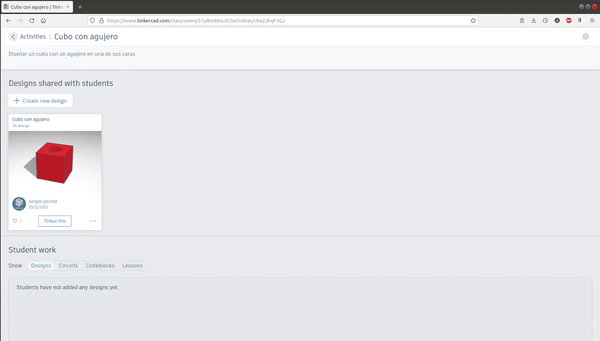
In the picture shown, we're able to monitor the advancement of our students and render assistance if needed. To provide assistance, just click on "Tinker this" and we will gain access to the design to determine what's happening and provide assistance in the best way possible.

When a student enrolls in your Tinkercad Class, they will automatically be placed in Safe Mode. This feature is designed to shield learners from any material or interactions that could be unwelcome or disruptive.
The Tinkercad Class provides a green shield symbol to indicate that Safe Mode is active. Instructors can control the features of the Class by toggling the green shield icon located in the Class and activating or deactivating the listed functions.
By default, Tinkercad Classes are set to "Safe Mode". This has the following implications for a student in a Class:
Teachers who are looking to minimise disruptions in their Tinkercad classroom should double check that Safe Mode is enabled, as indicated by the presence of a green shield on their class page.
Yes. Tinkercad is free, owned by Autodesk, and runs in a web browser with nothing to install. Its classroom features — teacher accounts, classes, and Safe Mode — are also free, which makes it well suited to schools and maker spaces.
No. Students can join using a class link and a nickname you assign, without signing up with a personal email. This keeps younger learners' setup simple and privacy-friendly.
Yes. Tinkercad exports to STL and OBJ, the standard formats for 3D printing. Open the exported STL in a slicer, choose your filament profile, and print. PLA is the easiest, most classroom-friendly material to start with.
Safe Mode is on by default in Tinkercad Classes. It keeps student designs private, restricts the gallery to curated Staff Favorites, and prevents profile edits — shielding learners from unwelcome content. A green shield icon shows it is active.
About the author
Sergio Peciña is a qualified Electrical & Electronics Engineer and Eolas Prints' Technical Design Engineer, with over 10 years of experience in 3D printing. He founded the maker spaces at the University of La Rioja and IDIVAL Santander. Every Eolas Prints filament is manufactured in-house in Cantabria, Spain, to ISO 9001 and ISO 14001 standards.
New to the field? Start with what 3D printing is, then equip your classroom with ISO-certified filament made in Spain — PLA is the easiest material for student projects.