
Your cart
Your cart is empty
Continue shoppingDrawer menu

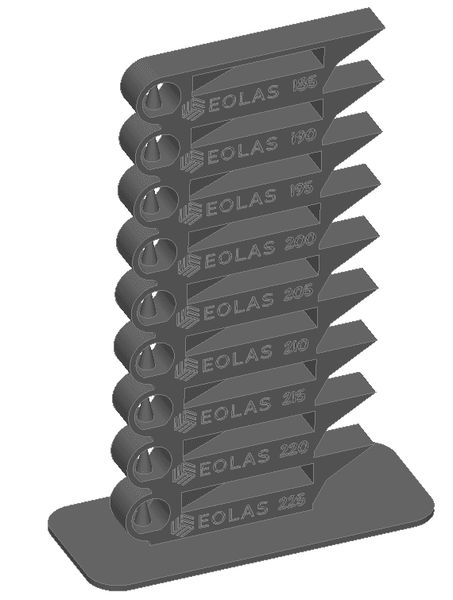
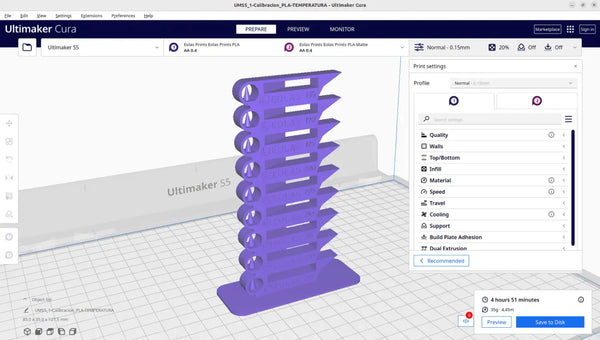
A temperature tower finds the ideal nozzle temperature for a filament by printing one part whose temperature steps down every few centimetres. You print it, inspect each rung for the cleanest bridges, overhangs and detail, and read off the best temperature. Run this first — before flow and retraction — every time you try a new material.
This test provides one of the main printing parameters of any filament: its extrusion temperature. The part is staggered, and the extrusion temperature is varied progressively in 5-degree steps. Because each material has its own optimum, there are separate parts per material — they are practically identical, only the temperature range differs for easier reading. Follow the steps below.
Download the appropriate part for the material (PLA, TPU, PETG) to be tested and adjust the printing parameters as follows:
In the slicer, we will adapt the gcode to vary the temperature automatically. This depends on the slicers that is going to be used, here we will use two of the most used slicers: CURA and PrusaSlicer.
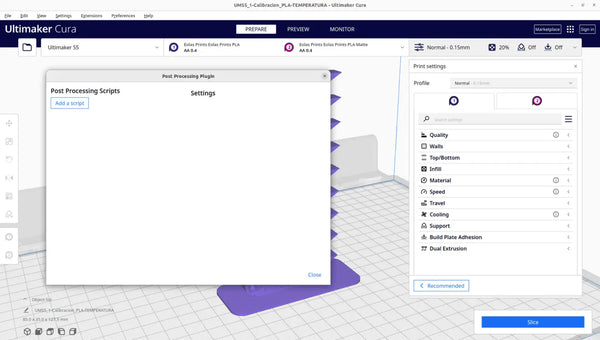
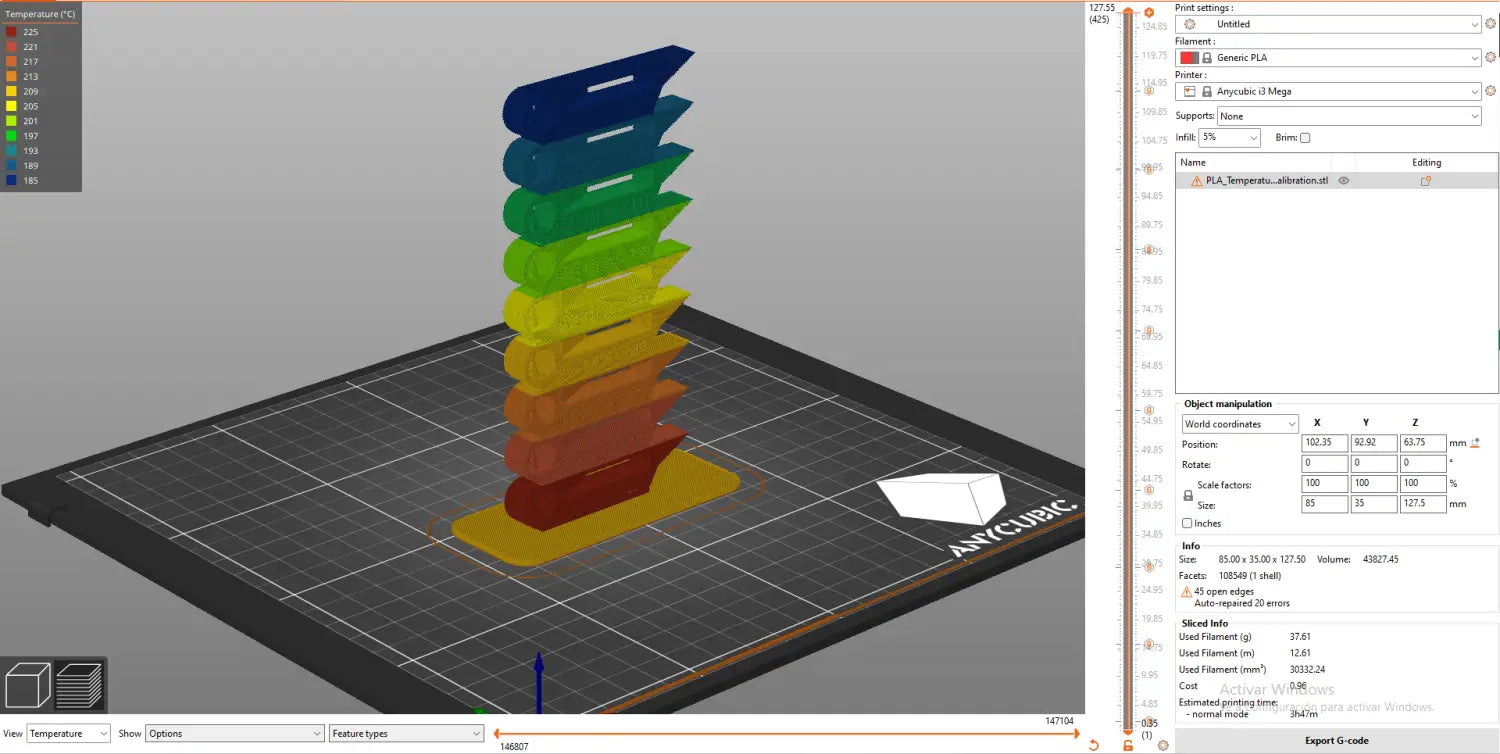
We slice the part with the above parameters and click on Extensions → Postprocessing → Modify GCODE. The following pop-up window will appear:
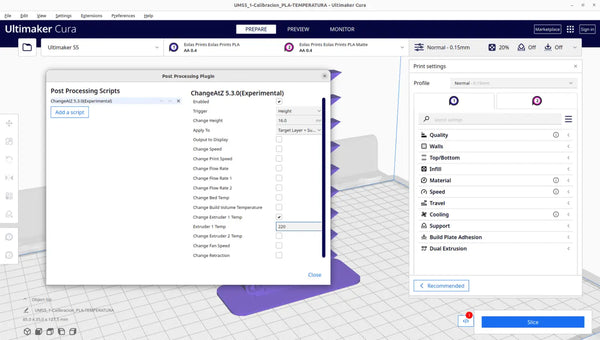
Click on add script and add "ChangeAtZ" and check the option "Change extruder 1 Temp" which is where we will enter the temperature of the second step. We also enter the height of 16 mm which is where the first step ends and the second begins, i.e. the place where we want the temperature change. Make sure to select the 'Apply to' drop-down menu's 'successive layers' option in order to apply the effect to multiple layers.
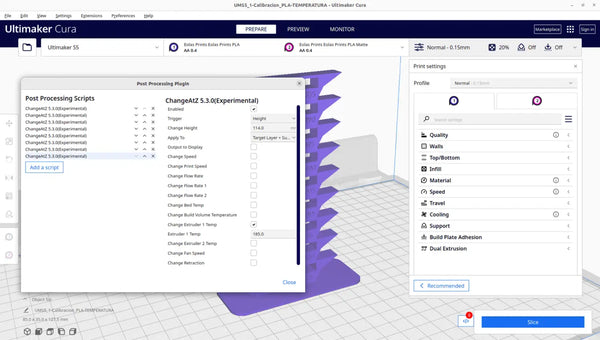
We add as many scripts as there are steps in the piece, taking into account that the first step ends at 16 mm and the other steps have a measurement of 14 mm.
We slice the piece again and it is ready for the temperature change at each step.
As you can see in the image to the left of the print information, there is a white square with a red circle with a number which indicates how many modifiers we have active at that moment.
We slice the part with the above mentioned parameters.

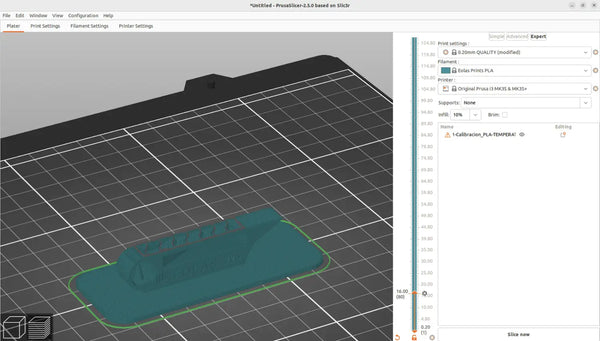
After slicing the part, the gcode is modified using the vertical orange bar to the right of the display.
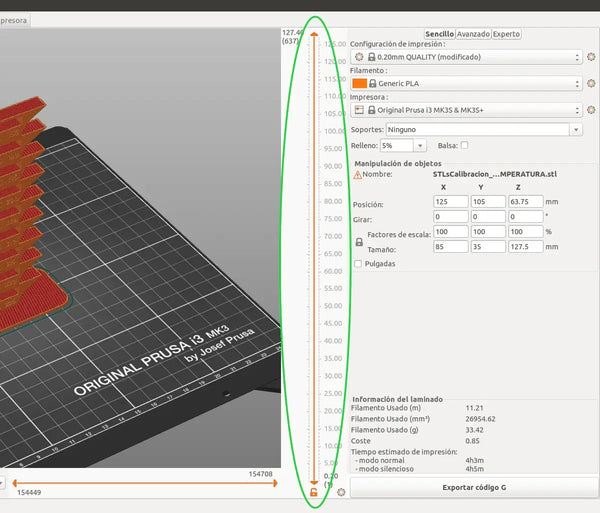
By moving the upper arrow, we place it in the temperature step change position (16mm).
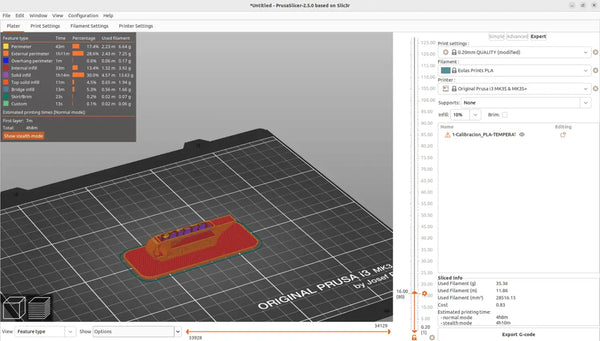
By right clicking on the hexagon next to the arrow, a menu will pop up in which you have to select the option "Add custom G-code". The following pop-up window will open:
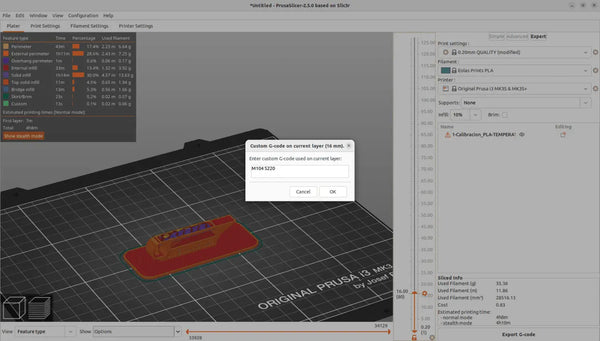
In the window write the temperature change command, which is M104, then indicate the new temperature, which is written in numerical format and placing an "S" in front of the number. For example, in case of PLA, in this first step the temperature should be changed to 220 degrees, so the code to entered would be: M104 S220.
After entering the code, click on accept and we can see that the layer in which the modifier has been entered has changed colour to indicate that some parameter has been changed.
The same procedure is used to change temperature for all subsequent steps. In other words, the step change layer is selected and a temperature modification is added.
When we have modified all the temperatures, slice it again for the changes to be saved in the G code that we will send to the machine.
After the temperature tower has finished printing, we observe the different steps with emphasis on the following questions:
After analysing all the rungs, we select the one that is best in these situations and the temperature indicated on it will be the optimum temperature for the analysed material.
A temperature tower is a single calibration print divided into stacked sections, each printed at a different nozzle temperature (usually in 5°C steps). By inspecting which section has the cleanest bridges, overhangs and surface, you identify the optimal printing temperature for that filament.
In Cura, use the ChangeAtZ post-processing script to set a new temperature at each step height. In PrusaSlicer, right-click the layer at each step boundary and add a custom G-code command — M104 S followed by the temperature (for example, M104 S220 for 220°C).
Choose the step with the best overall result: clean bridging across the central hole, sharp overhangs at 15/30/60°, smooth rounded areas, and crisp lettering. If two steps look similar, the lower temperature is usually the better choice for less stringing.
Once you have your ideal temperature, calibrate flow rate next, then retraction. All three build on a correctly calibrated extruder.
About the author
Sergio Peciña is a qualified Electrical & Electronics Engineer and Eolas Prints' Technical Design Engineer, with over 10 years of experience in 3D printing. He founded the maker spaces at the University of La Rioja and IDIVAL Santander. Every Eolas Prints filament is manufactured in-house in Cantabria, Spain, to ISO 9001 and ISO 14001 standards.
Get consistent results with consistent filament: shop PLA | PETG | TPU — ±0.05 mm tolerance, made in Spain. See more calibration guides in our troubleshooting & calibration hub.


