
Your cart
Your cart is empty
Continue shoppingDrawer menu

A flow (extrusion multiplier) calibration corrects small variations in filament diameter so your printer deposits exactly the right amount of plastic — fixing under-extrusion and over-extrusion. You print a thin-walled cube, measure the walls, and apply a simple formula to get your flow percentage. Here's the full method.
NOTE: For this flow calibration to work correctly, your extruder must first be properly calibrated (the so-called e-steps). See our extruder calibration guide first if you haven't done that yet. Flow calibration is best done after a temperature tower, since you'll print this test at your material's ideal temperature.
We download the following part (Flow_Test) and adjust the printing parameters as follows:
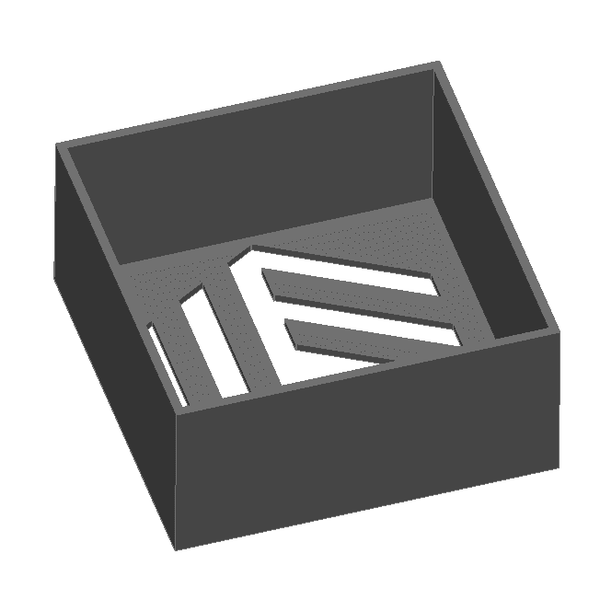
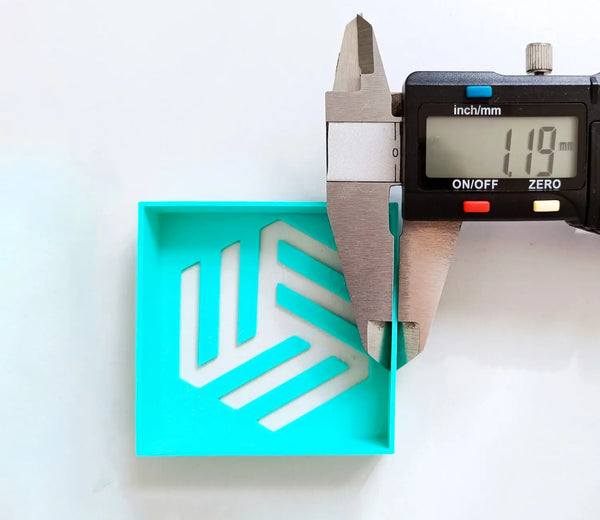
We use a caliber to measure the thickness of the four walls of the cube, then calculate the arithmetic mean of these values to determine the piece's dimensions.
With the value obtained we apply the following formula:
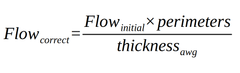
We introduce the value obtained in the slicer and we will have calibrated the flow of our 3D printer.
In the example piece, the following values have been obtained: 1.19 mm, 1.22 mm, 1.21 mm and 1.21 mm. So using the above formula, we obtain a correct flow rate of:
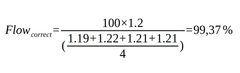
Rounding this value will be used as the correct flow 99% for future printing.
Flow rate, also called the extrusion multiplier, is a slicer setting that scales how much filament the printer pushes out. At 100% the printer extrudes the calculated amount; calibrating it corrects small filament-diameter variations so you avoid under- or over-extrusion.
Print a thin-walled calibration cube with retraction disabled and flow at 100%, measure all four walls with calipers, average them, and divide the target wall thickness by your measured average. Multiply your current flow by that ratio to get the corrected value.
Temperature first. Run a temperature tower to find the ideal nozzle temperature for your filament, then print the flow test at that temperature — flow is sensitive to temperature, so calibrating in the wrong order gives misleading results.
Ideally yes, at least per material type and brand. Different polymers and even different colours can have slightly different diameters and flow behaviour. With consistent, tight-tolerance filament (±0.05 mm) the differences are small, but a quick check per new spool type is good practice.
About the author
Sergio Peciña is a qualified Electrical & Electronics Engineer and Eolas Prints' Technical Design Engineer, with over 10 years of experience in 3D printing. He founded the maker spaces at the University of La Rioja and IDIVAL Santander. Every Eolas Prints filament is manufactured in-house in Cantabria, Spain, to ISO 9001 and ISO 14001 standards.
Calibrate with consistent, tight-tolerance filament: shop PLA | PETG — ±0.05 mm tolerance, made in Spain. See more calibration guides in our troubleshooting & calibration hub.


